

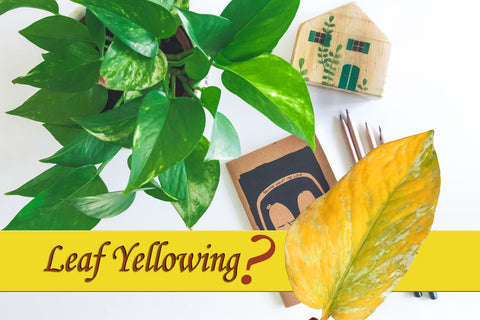
You are watering your plant and you notice a small yellow spot on one of the leaves. You gasp and hope that it goes away. But in the next few days it gets worse. You wonder why it's happening especially since you have been taking such good care!!
A plant leaf turning yellow is a sign of it being under stress and it needs some nursing back to health. But don’t worry!! Yellowing of leaves is a very common problem and can be resolved.
Leaves can turn yellow due to a host of reasons and it can be tricky to pin-point the exact one. But to fix the yellowing of leaves it is crucial to find out the exact cause. Follow the simple steps below to identify the exact cause and solution to the yellowing of your plant leaves.
Poke your finger about an inch inside the soil and check whether the soil is dry or damp. If the soil is dry that means the plant is under watered. Feed it some water immediately.
If the soil is damp and cool then the plant may be over watered. Not necessarily but it could be. Check for other signs of overwatering like wilting, edema or root rot. If you suspect that your plant is overwatered then adjust your watering schedule and consider repotting it.
As a rule of thumb, for most plants, you should water them when the soil feels dry to the touch. But again, different plants have different needs. Some plants such as ferns, baby tears, spikemoss etc like consistent moist soil. Whereas others such as cacti, succulents, snake plants, sago palm etc. thrive on less water.
After ruling out transplanting and overwatering / underwatering, check if your plant has been getting enough sunlight. When your plant doesn’t get enough natural light its leaves can turn yellow. Usually the leaves facing away from sunlight will turn yellow first. In this case move your plant to a location where there is more sunlight or consider using an artificial light.
There is also such a thing as too much sunlight. Some plants thrive in low to medium sunlight and get stressed with too much light. See below for a list of houseplants segregated according to their lighting needs.
|
Low-Light Plants (North facing window or a dark corner) |
|
|
|
Medium-Light Plants (East or West facing window or well lit areas) |
|
|
|
High-Light Plants (South facing window) |
|
|
A lot of plants do not like cold temperatures. Check if your plant is near an air conditioner vent or near a window through which cold wind is leaking in. If so, then move your plant away from there and check after a few days how it responds.
So you’ve gone through all the steps till now and still can’t figure out? Then scan your plant for pest attack!!
Pests can be difficult to see with the naked eye but you can notice other signs. Look for tiny holes on the leaves or small deposits of clear, sticky fluid. These could be caused by different types of pests such as aphids, mealybugs, spider mites, snails etc. To treat pest infestation you can try spraying water mixed with liquid soap, cutting off the affected leaves or using insecticidal spray. Make sure to check thoroughly for pests before ruling out pest infestation.
pH of soil can be checked using a simple pH meter. Most plants need a pH of around 6.0 for proper absorption of the nutrients through the roots. However, a google search will tell you the optimum pH of soil for your specific plant.
Depending on where the pH of your soil is in relation to the optimum pH required for your plant you need to either increase or decrease the soil pH. To increase the pH by 0.5 units mix 1 teaspoon of lime with 3.5 litres of water and pour it onto the soil. To decrease the pH of the soil by 0.5 units add half a teaspoon of sulfur per 6 inches of pot diameter.
Before diagnosing the cause of yellowing leaves to nutritional deficiency ensure that the pH of soil is in optimum range. This is because an imbalanced pH can affect absorption of nutrients even if all the nutrients present in soil are in sufficient amounts. After ensuring that soil pH is ideal, check for nutritional deficiency.
The most common nutrient deficiency is nitrogen. Nitrogen deficiency shows up as complete yellowing of the older leaves generally at the bottom of the plant. Potassium deficiency will show up as leaf edges turning bright yellow. Magnesium deficiency starts as yellow patches between leaf veins on older leaves. Iron deficiency also shows up as similar to magnesium deficiency but the yellowing between veins hits the younger leaves first. Sulfur deficiency starts with younger leaves turning them yellow throughout.
After identifying the deficient nutrient, look for plant food that could supplement the required nutrient.
Your plant may look fine but it might have outgrown its pot at the roots. When this happens the plant is called rootbound meaning its root system is bound by the pot it is in. To check whether your plant is root bound, gently slide it out of its pot. If you see a dense complex pattern of roots encircling the soil then your plant is rootbound. To cure your rootbound plant, untangle the roots and repot it in a bigger pot.
Yellowing of leaves can also occur when you add too much fertilizer to the soil. Excess fertilizer prevents the plant from taking up water which stresses the plant as it doesn’t get the nutrients it needs. If there is a build-up of fertilizer in your potted plant then place the plant in a sink and flush it out thoroughly with water getting the fertilizer out of the bottom of the pot.
If you have just recently transplanted your plant you might notice some yellowing of the leaves. This is most likely due to the stress or shock that plant feels due to transplanting and is known as transplant shock. Transplant shock can happen due to changes in soil pH, soil temperature, soil texture, soil moisture, soil temperature etc. Usually the yellowing of leaves due to transplanting shock should go away after a few days when the plant is accustomed to the new soil. So continue taking care the way you were and check after a few days.
Leaves turning yellow and dropping off is a normal part of plant growth. Usually this happens at lower leaves. In this case, don’t worry and continue taking care of the plant as you were!!
So that’s it!! As you can see there are a lot of reasons due to which the plant leaf could turn yellow and it can be tiring to figure out the exact one. But a little patience would go a long way and you and your plant would be quite grateful to you for it. Just try troubleshooting with the tips above. Hope this helps!
Bought a Rolling Nature plant? Have plant related queries, kindly connect with us at care@rollingnature.com or WhatsApp or call us at 8698407574 for assistance. We are always happy to help. Every plant is precious and the joy it carries with it is never ending. But it does need proper care and conditions to thrive and grow. Rolling Nature ready potted plants are low maintenance plants, with unique potting mix, that requires less watering. They are handpicked and highest quality plants without pest infection, raised and nurtured in our green house well equipped facility. The fertilizer needs of the plant is minimal too, for the first 6 -12 months you may skip it. When you purchase from us you can leave the plant worries to our experts. Did you know? Our indoor plant selection has air purifying plants recommended by NASA that can help beat you indoor air pollution. Explore our collection of plants to choose right plant in finest handcrafted pots & stay healthy indoors!
Author: Vandana Chaudhary